Refining the Look of Our Characters for Consistency
The Secret Arboreal Fan Club characters are great, as first drafts go. All the way from Akiko, to Kodo, to Shinya. Nonetheless, making and visualizing a story without a dynamic collection of ways we can represent our characters is tough.
Be sure to keep this in mind for how much time you have to follow along. You can always bookmark this page and come back.
What Does This Mean?
Putting together a complete picture of each character should include poses, expressions, and styles to help us communicate the nuance, temperament, and reactions of characters in the story. This applies to our protagonists, antagonists, and occasional supporting characters.
This is important to tackle before we start generating stories and accompanying imagery. Like most things, the pre-work saves on rework, whether we were doing this work by hand or using tools like ChatGPT and MidJourney.
What do We Need?
Before we begin, as a point of note, we will need some extra tools to do this work.
- MidJourney
- Adobe Photoshop, ProCreate, GiMP or similar editing software
- Some image of a character we want to work from
- Five powerful MidJourney tricks
I will use the Secret Arboreal Fan Club character Nokaguchi Kaede as our example in this post and the Secret Arboreal Fan Club character Nokaguchi Kaederepeat this process for all the SAFC characters before stories start getting posted. This includes Kodo and the baddies the group will encounter along their journey.
Output
First, although we'll do only one character for this post, let's define what we need to work on for each character:
- A set of standard poses and action poses for each character.
- Views of our character in turnaround poses (looking forward, away, to the sides, etc.).
- A set of emotional expressions for each character.
- Any additional supporting personal elements.
- Test images based on the poses, expressions, and personal elements.
What Are These Things?
Character sheets, pose sheets, turnaround sheets, and a character's special toys are all part of putting together a complete character and getting more consistent results for that character out of MidJourney.
Using image injection with MidJourney's remix mode, you can ensure your character looks and acts how you want and their toys or tools, such as weapons or their favorite book, look more consistent.
While there is no guarantee you'll get the exact results you want, and you may still need to edit a bit after the fact, this system will help ensure you have to do those things only minimally. This is true whether you're just generating art or a long-running webcomic.
Process Summary
For those with less time, here's an outline of our steps in this process.
- Define your character, who they are, and what makes them who they are (be faithful to them).
- Define the list of poses and expressions your character should use; remember you can add more later and avoid going out of character.
- Select a core image of your character as inspiration.
- Create and tweak a prompt in MidJourney that gets you close to your character's basic look (it doesn't need to be perfect).
- Tweak that prompt to generate poses specifically.
- Use remix mode to inject your character into the MidJourney results.
- Use an image editor to cut each pose out of the image and onto your character sheet.
- Repeat until you have all the poses you need (remember you can add more later).
- Create and tweak a prompt in MidJourney to generate expressions from your list.
- Use remix mode to inject your character into the MidJourney results.
- Use an image editor to cut each expression image onto your character sheet.
- Repeat until you have all the necessary expressions (remember you can add more later).
- Create and tweak a prompt in MidJourney to generate action poses.
- Use remix mode to inject your character into the MidJourney results.
- Use an image editor to cut each action pose out and paste them onto the character sheet.
- Repeat until you have all the action poses you need (remember, you can add more later).
- Export the poses and expressions individually.
- Using original image prompts or image injections with remix mode, watch the magic happen as you influence MidJourney to output results using the poses and expressions you feed it.
- Optionally save your character's basic look as a preset for later use.
Digging In
Where to Start
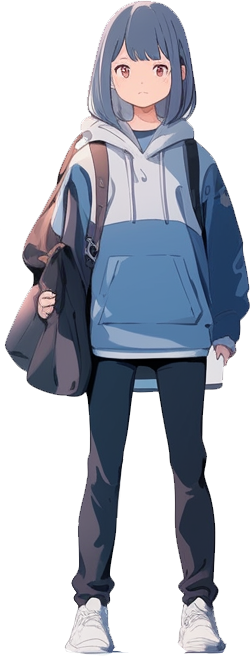
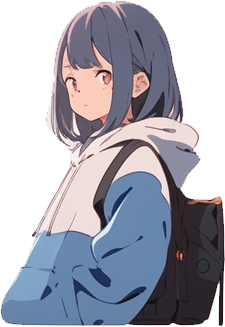
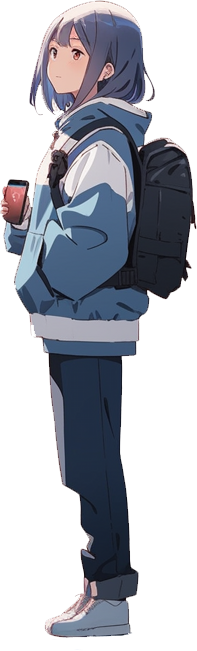
Let's start by looking at what we've got for our character, in this case, Nokaguchi Kaede from my Secret Arboreal Fan Club series.
Kaede is a character I want to focus on here because I expect her to be uniquely expressive, with lots of exaggerated poses and looks. The other characters will all have their own range, including little Kodo, who might pose some of the biggest challenges despite being a familiar for the group.
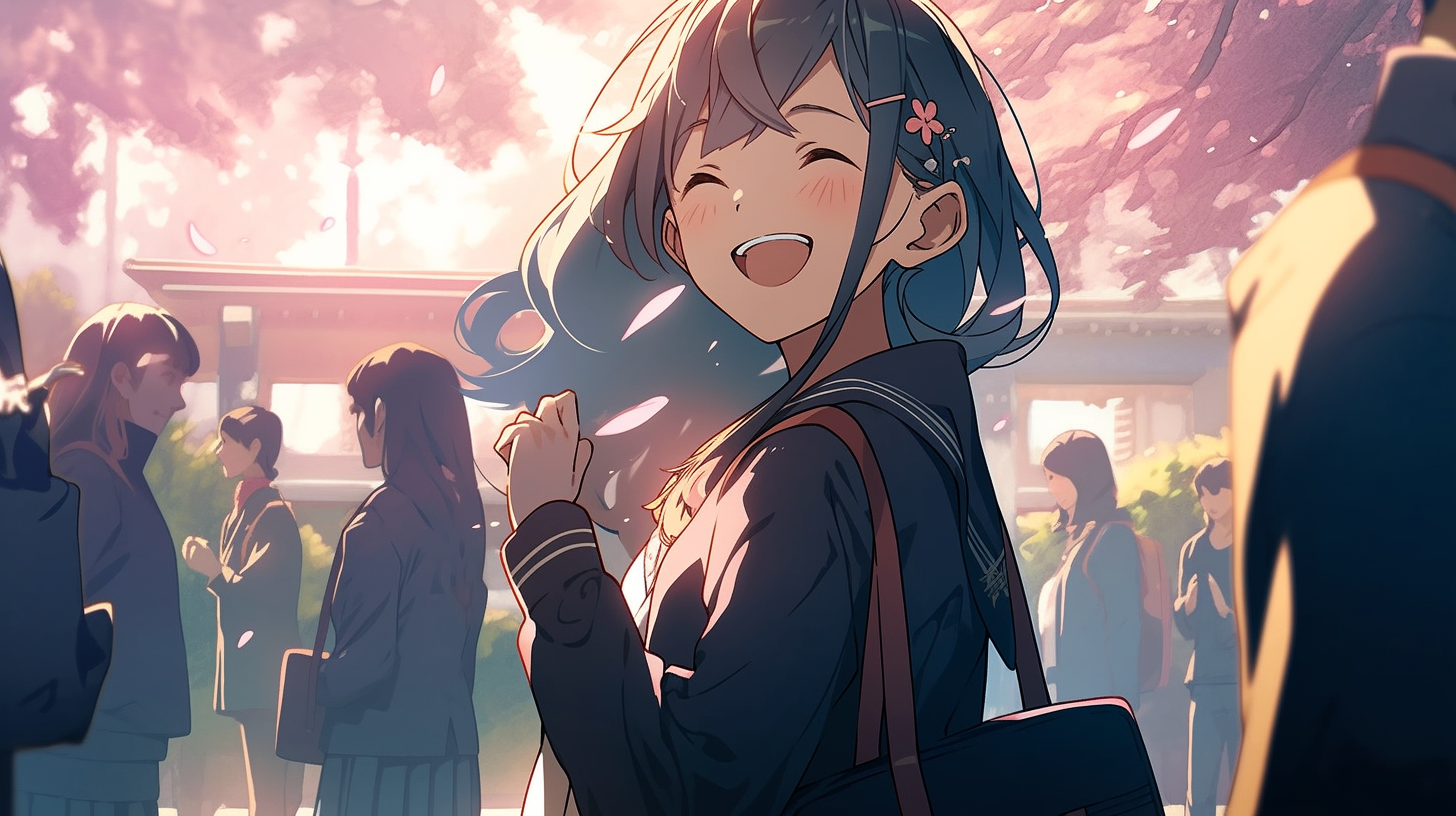
The original prompt for Kaede looks like this:
The results we got back from that prompt included this four-panel of choices.
From the prompt, we know we have certain traits needed for Kaede. These include her age, hair color, and that she attends school, which probably means a uniform a good deal of the time we see her.
It's important that we catalog these attributes because MidJourney won't always honor them unless we tell it to. One great thing about the approach we're taking is that if we maintain these attributes in the character's various poses and expressions on the character sheet, we won't have to do as much recycling in MidJourney to get the look right for the character.
Defining Core Traits
Let's define a few other specific traits for Kaede using her bio to help us keep things lined up.
- 13 years old
- Japanese
- Attends school
- 153cm (5'1")
- Energetic, friendly, effusive
Primary Emotional Range
Those are the core traits of Kaede as a character. But we know she needs a wider range of emotions. All good characters should. Now, we can generate more for the character sheet later, but let's list a handful of core expressions/emotions all characters should have on their sheets.
- Anger
- Confusion
- Curiosity
- Excitement
- Frustration
- Surprise
Defining Core Poses
Now, because of who she is as a character, it's less likely that Kaede will express things like rage or take particularly aggressive poses. It just doesn't line up with her character. But here is a list of core poses for Kaede.
- Bending over (maybe she's investigating)
- Facing away (can see the back)
- Facing forward (can see the face)
- Facing left
- Facing right
- Recoiling (disgust or fear?)
- Sitting
- Standing
- Thinking
- Yelling
Defining Action Poses
Characters who stand around are boring, even if they're saying something. We know the Secret Arboreal Fan Club crew has some epic stuff ahead of them. Most of these are pretty predictable needs.
- Attacking (fists? weapons? magic?)
- Climbing
- Defending
- Jumping
- Punching
- Running
- Talking
- Throwing something
Defining Unique Poses & Expressions
Kaede, in particular, is expected to be more expressive. That means more core emotions, core poses, and action poses. It also means we may want some unique poses to help her stand out in the ways we expect.
Unique poses could include hanging upside down or doing the Naruto ninja run. Unique expressions could include some cutesy chibi looks that don't fit other characters or would be otherwise unexpected for the look/feel of the character or story. A sudden chibi Shinya from the group would be rather jarring - though perhaps hilarious in the right settings.
Your Core Character Prompt
Before generating poses, we must ensure our core character prompt gets us the basic results we expect. Earlier, I provided the following prompt example for Kaede.
I'm going to take a step back from this and remove the following pieces from this prompt:
- Image URLs
- Definition of the image as a portrait
- Emotional indicators
- Artist & photographer names
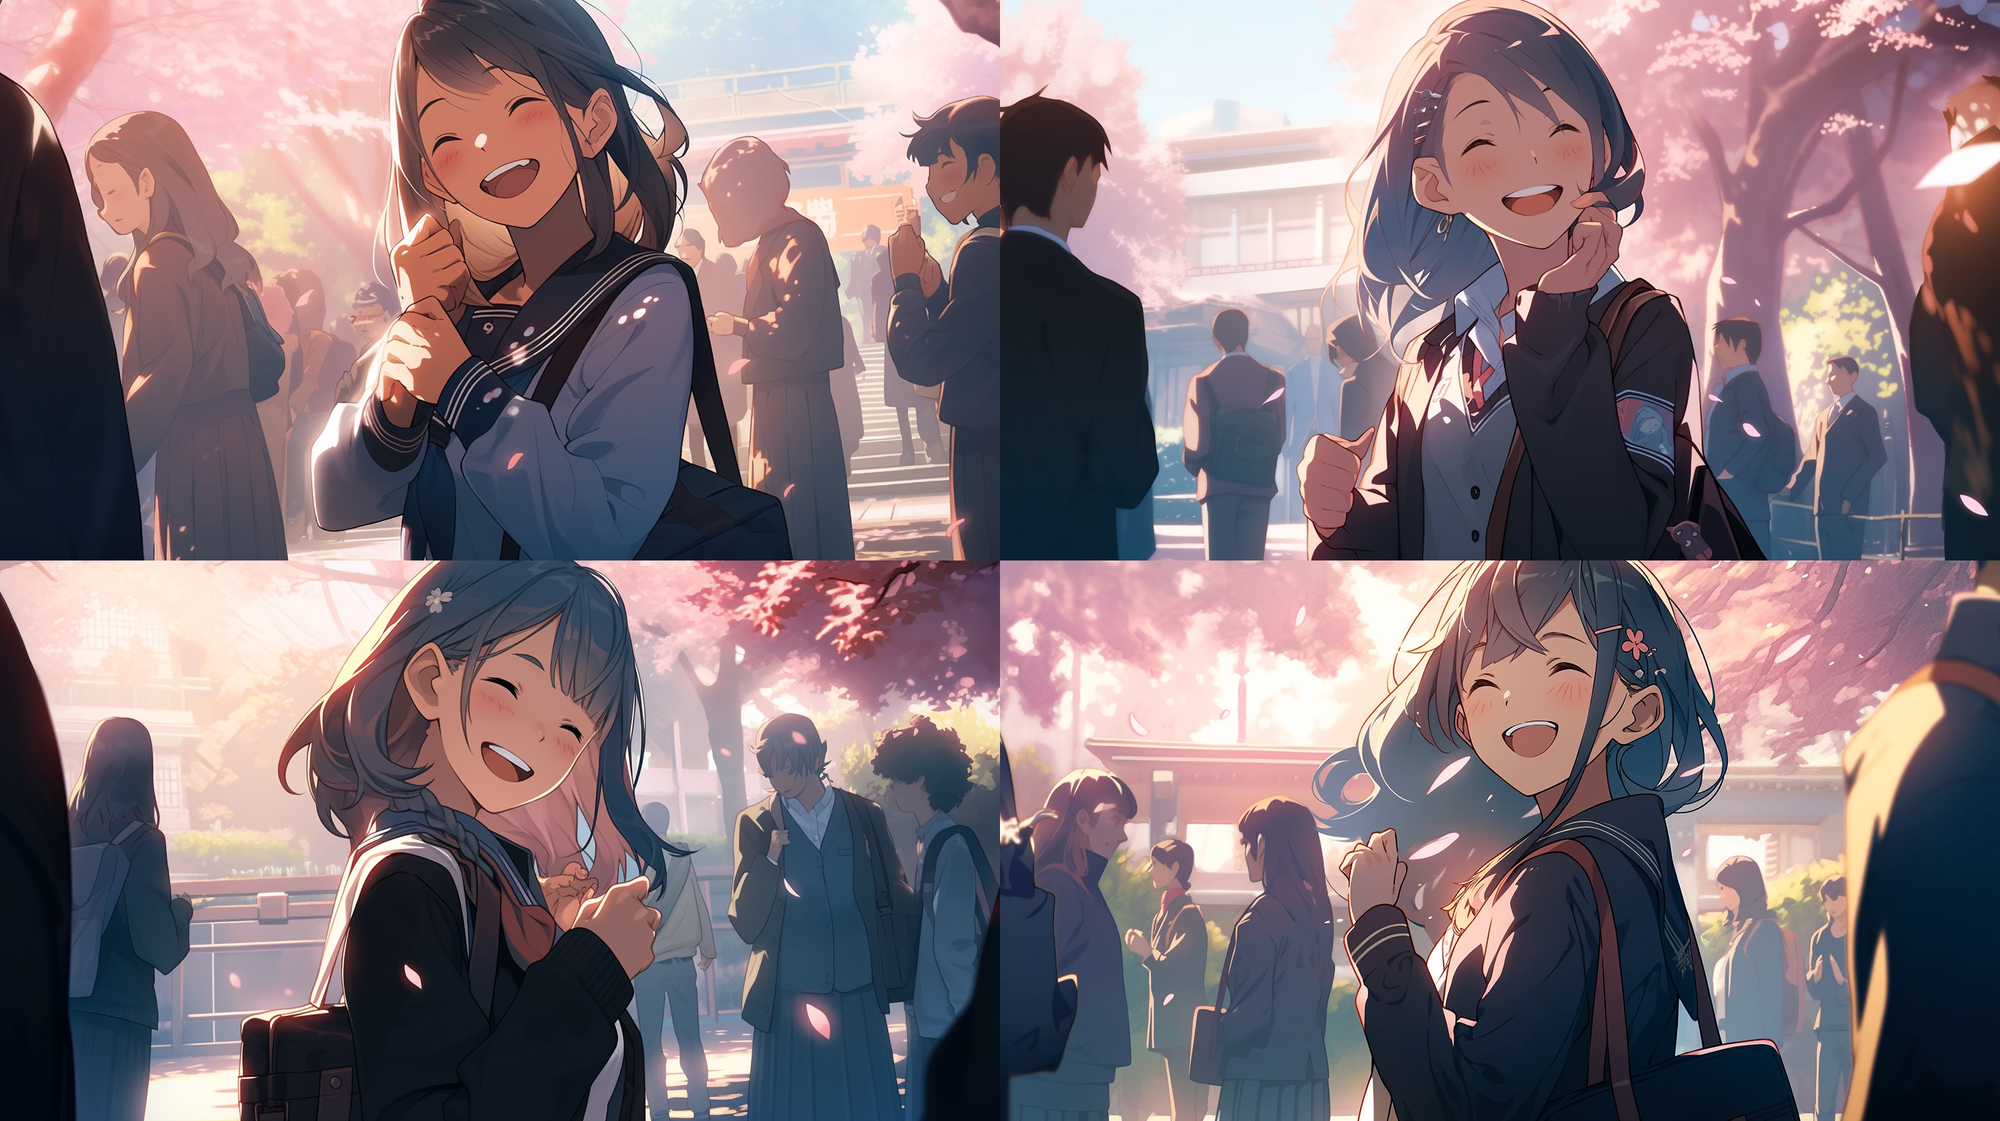
We're left with the following as the prompt.
This is great! Except for the fourth panel, the results are accurate to her gender, hair color, and the rough look of her age.
It's critical to ensure your base character look is close before injecting the poses and expressions into other things later.
Generating Core Poses
Now that our basic character prompt looks good let's add some stuff to let MidJourney know we want a variety of poses.
In most cases, you'll want the flexibility of having the entire body of the character visible for poses. In contrast, you can often get away with just the face or upper body for expressions.
Considering all this, let's add the following to the beginning of the prompt.
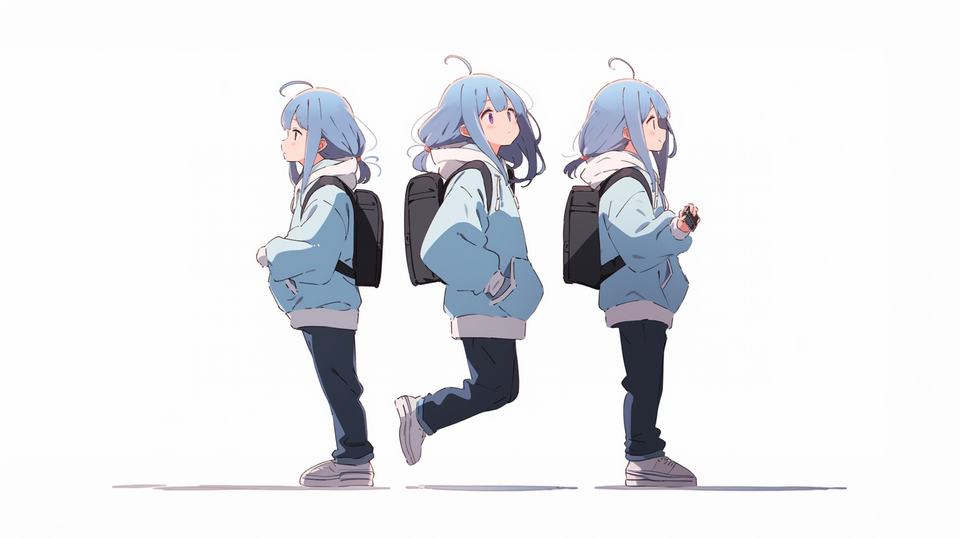
full body turnaround, multiple poses, her, blue hair
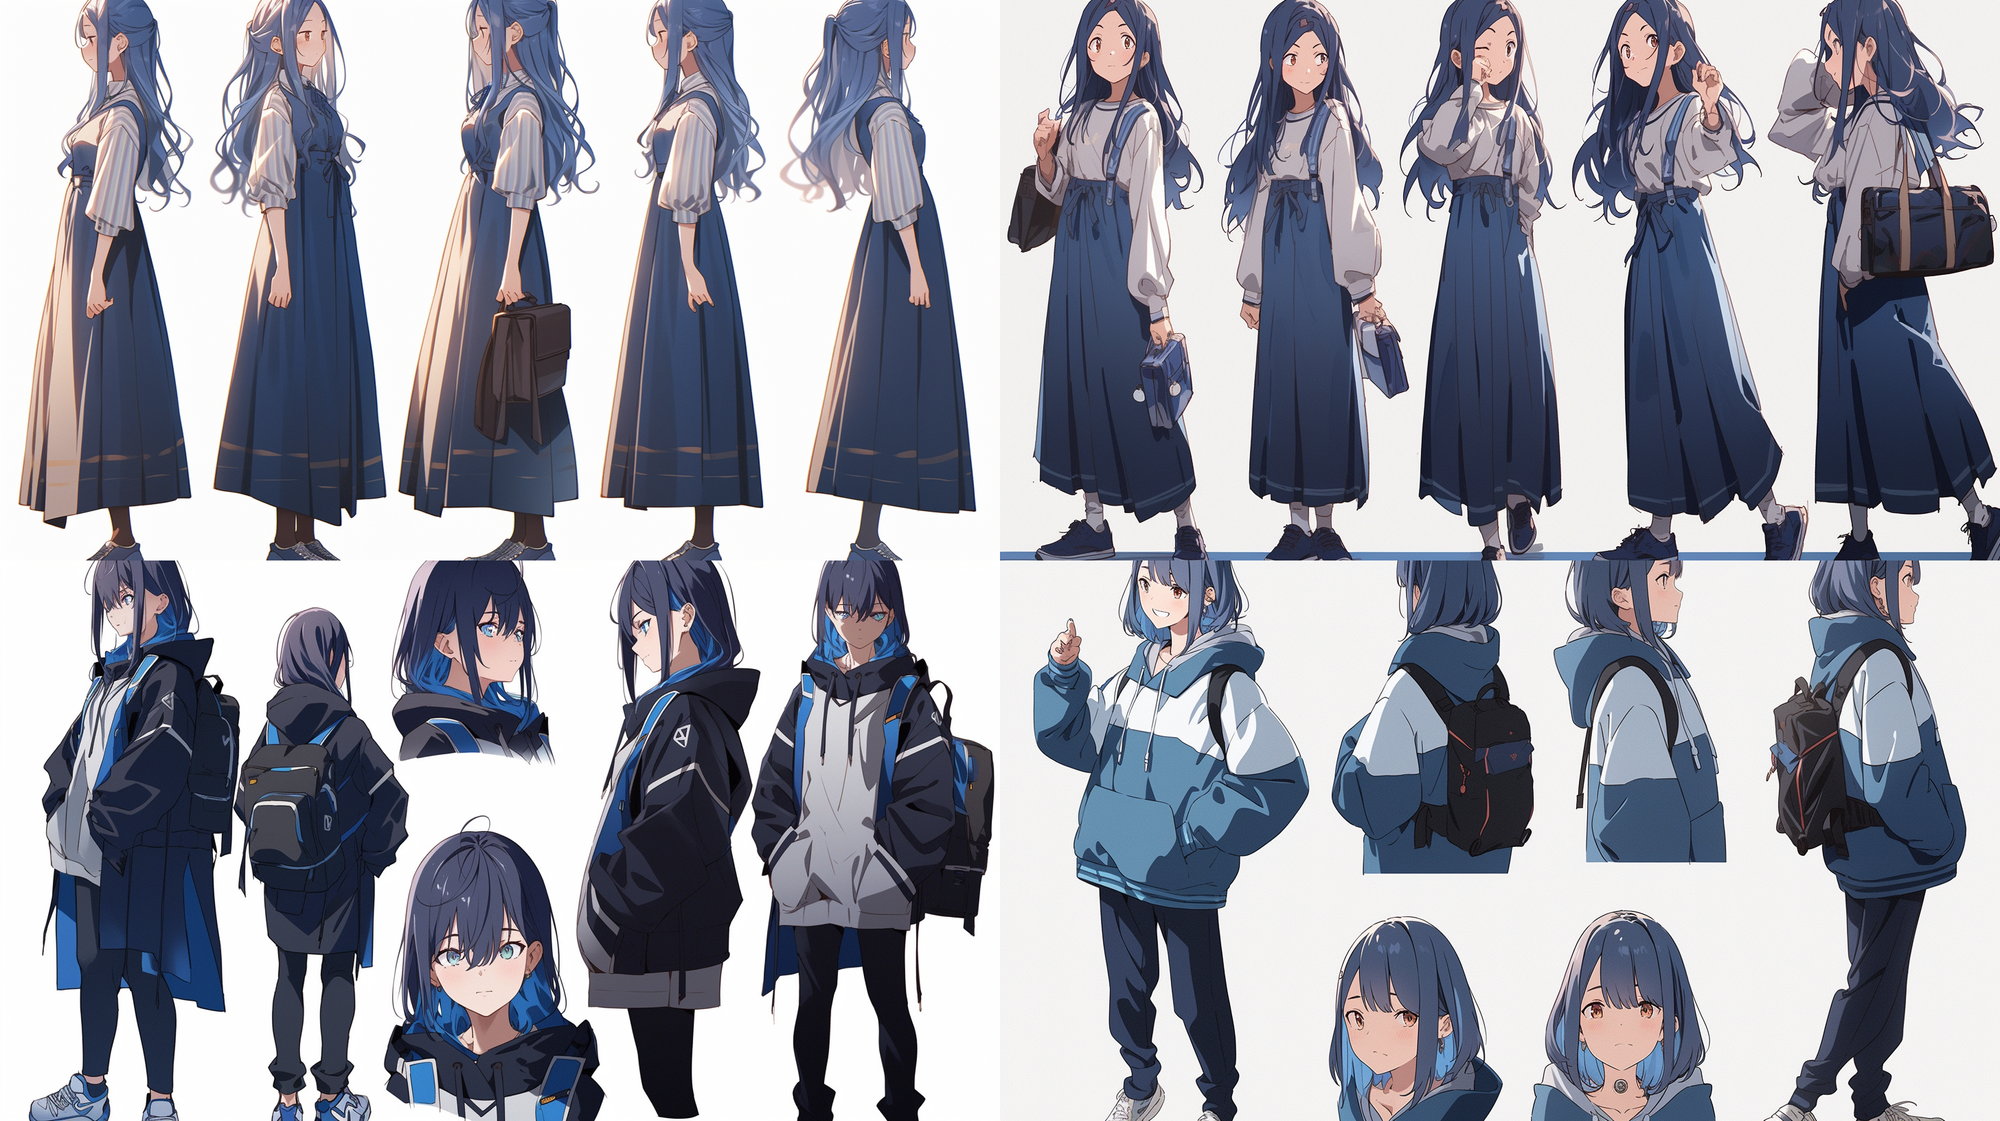
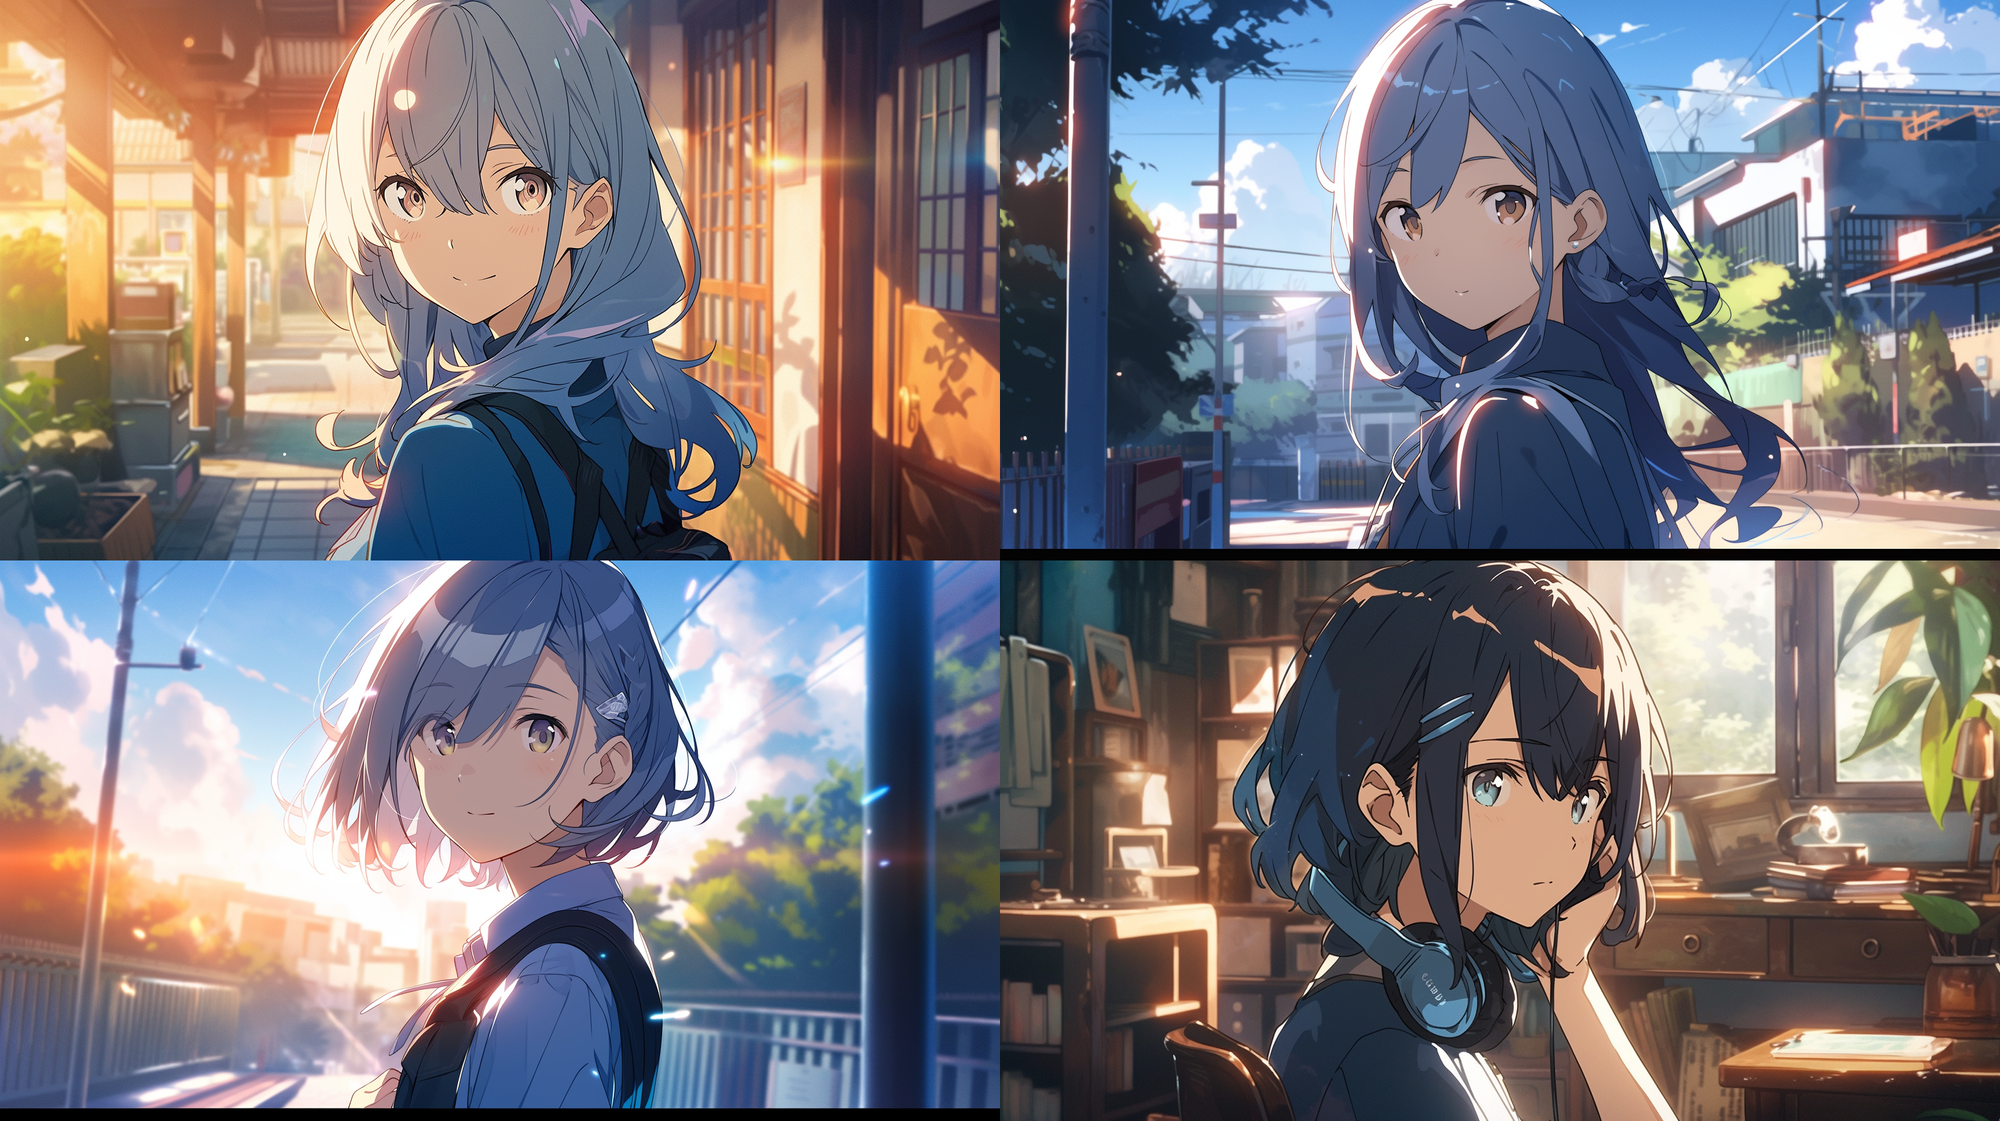
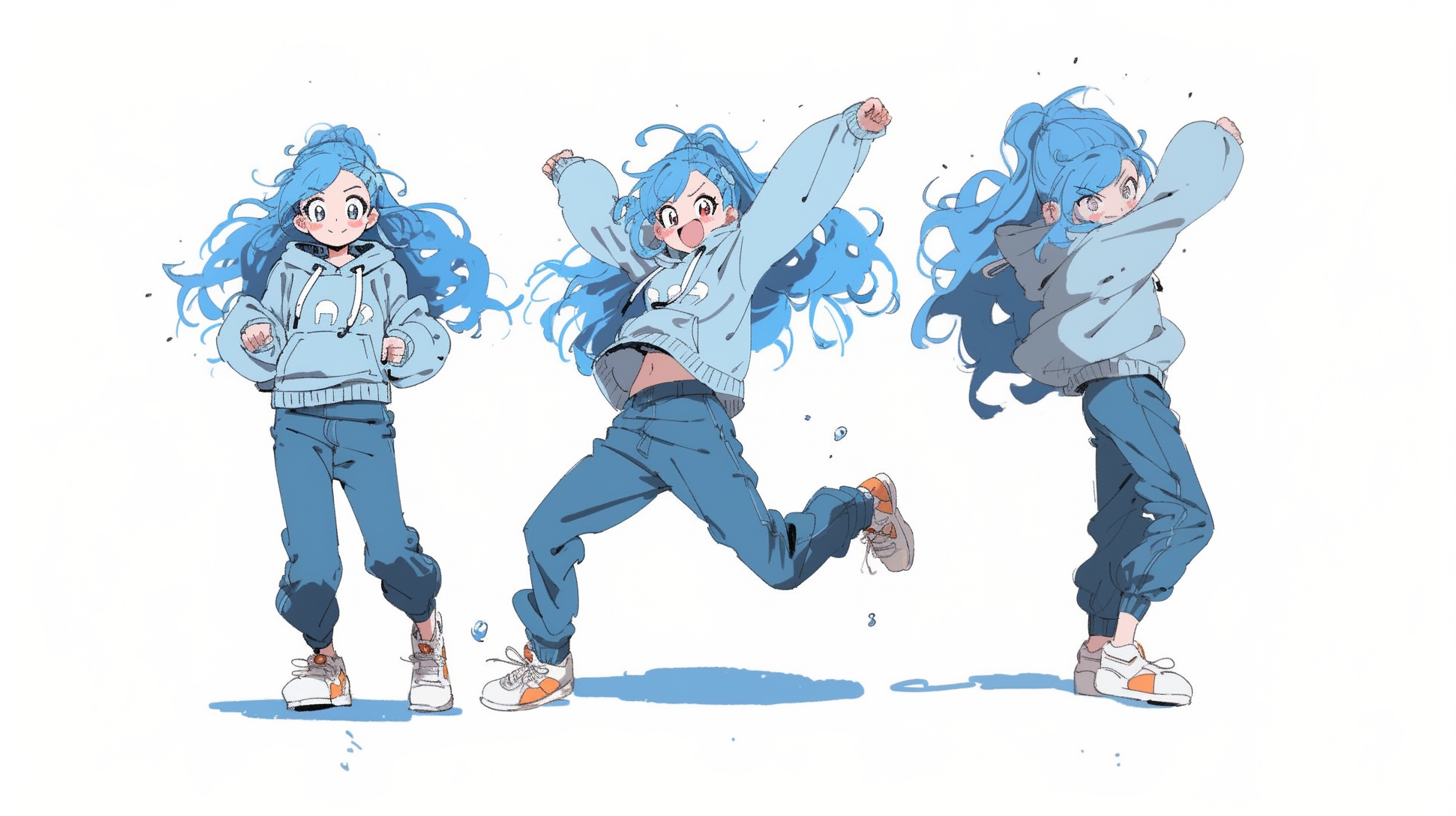
These initial results look great. It may take you a few tries and some tweaks. While they differ from my original character image, they might offer more flexibility for who we want the character to be. Tweak your base prompt to get what you need.
I'm excited about panel 4 in the results above, but I need parts that are cut off. So, I am going to upscale and zoom out 1.5. This gives me room for extra poses, but I also get space around Kaede's head and body for what I need to do with this later.
Picking one core result and regenerating or using image injection will get you what you want with tweaks, repetition, and practice.
This is great! Although I need to take parts from multiple generated panels and generate more to get all my poses, I love this look for Kaede. We even have a little motion where she is pointing a finger or lifting a heel and a smiling expression. Gold!
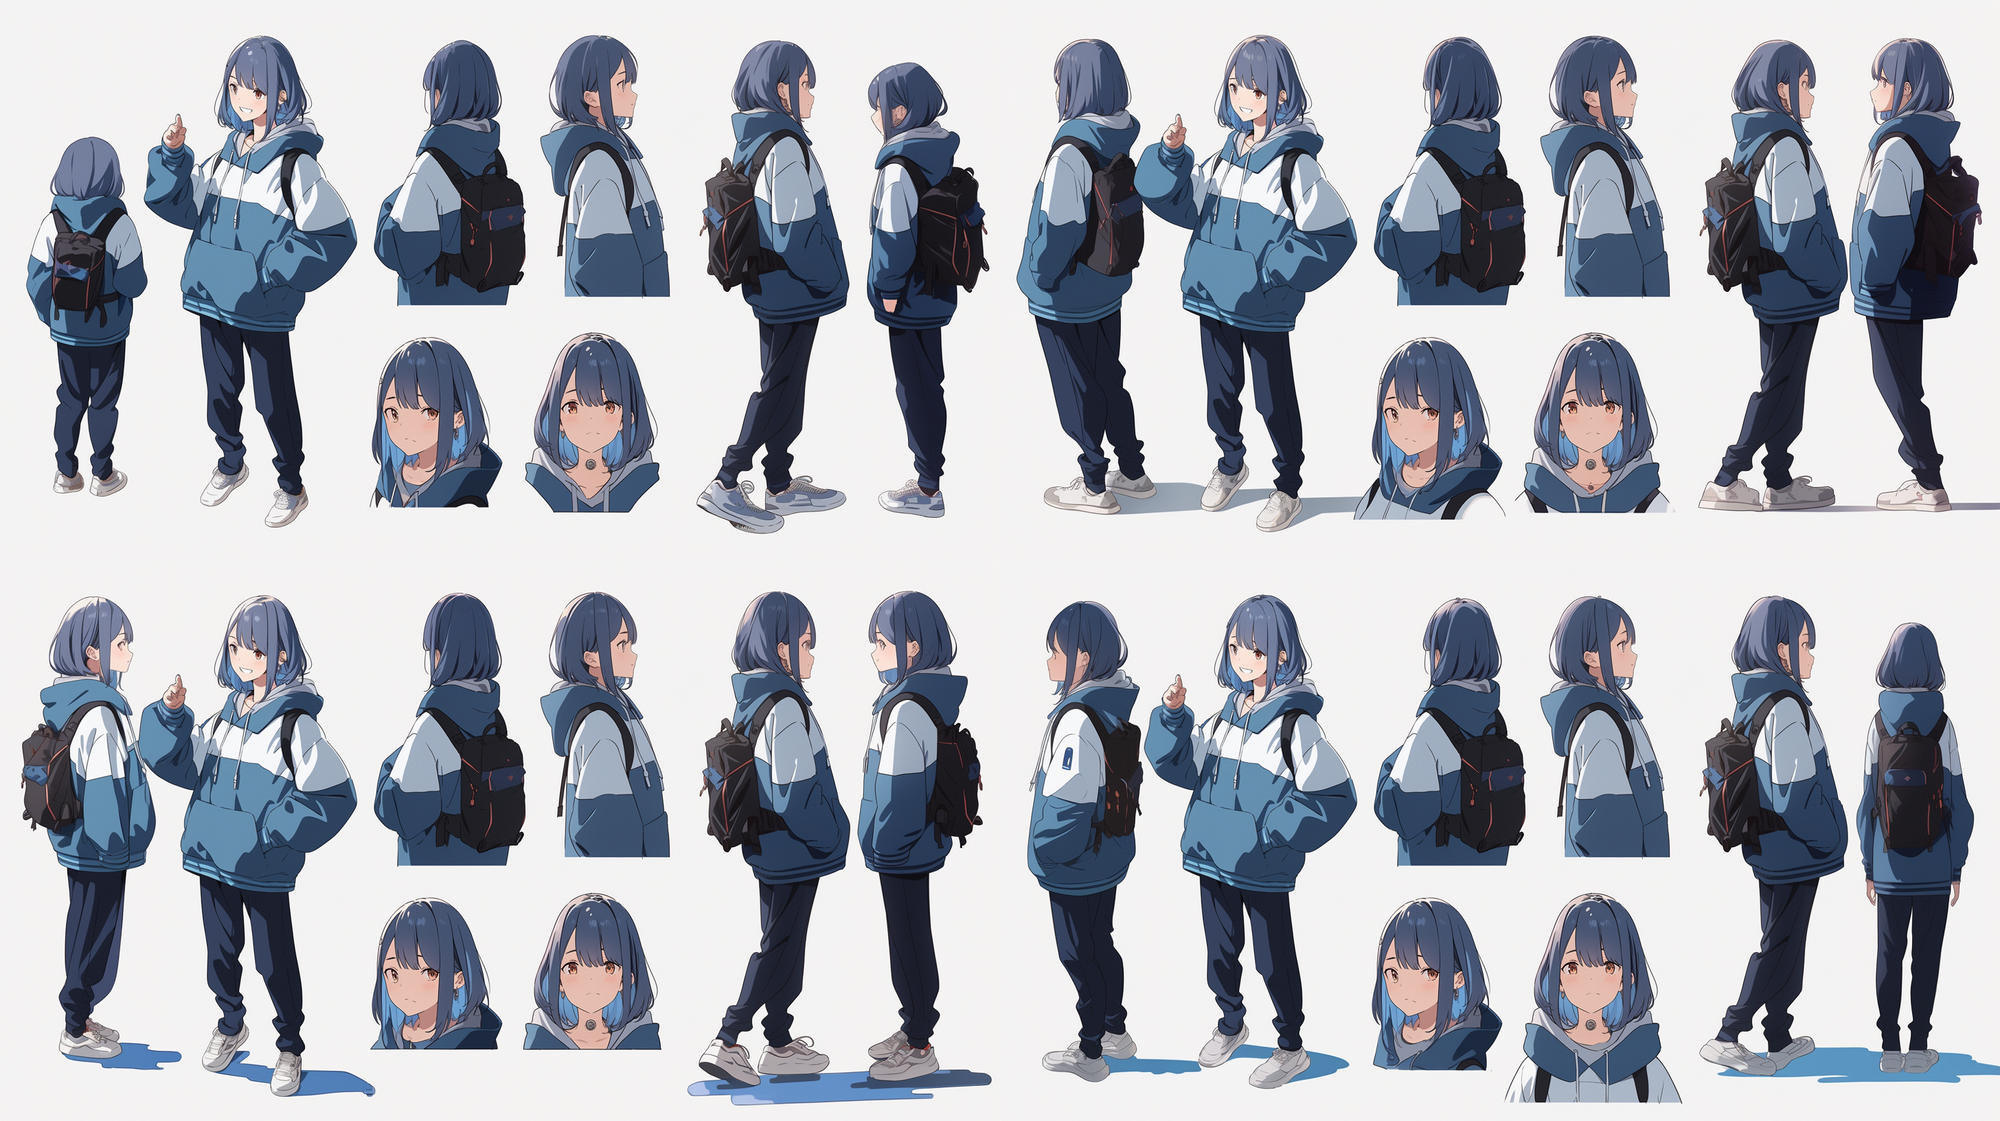
Repeat this process as often as needed to get all your core poses. Remember, you can always add more later.
Scroll down to the section "Building the Character Sheet" if you want to tackle action poses and expressions in separate blocks of activity instead of doing all the generation up front.
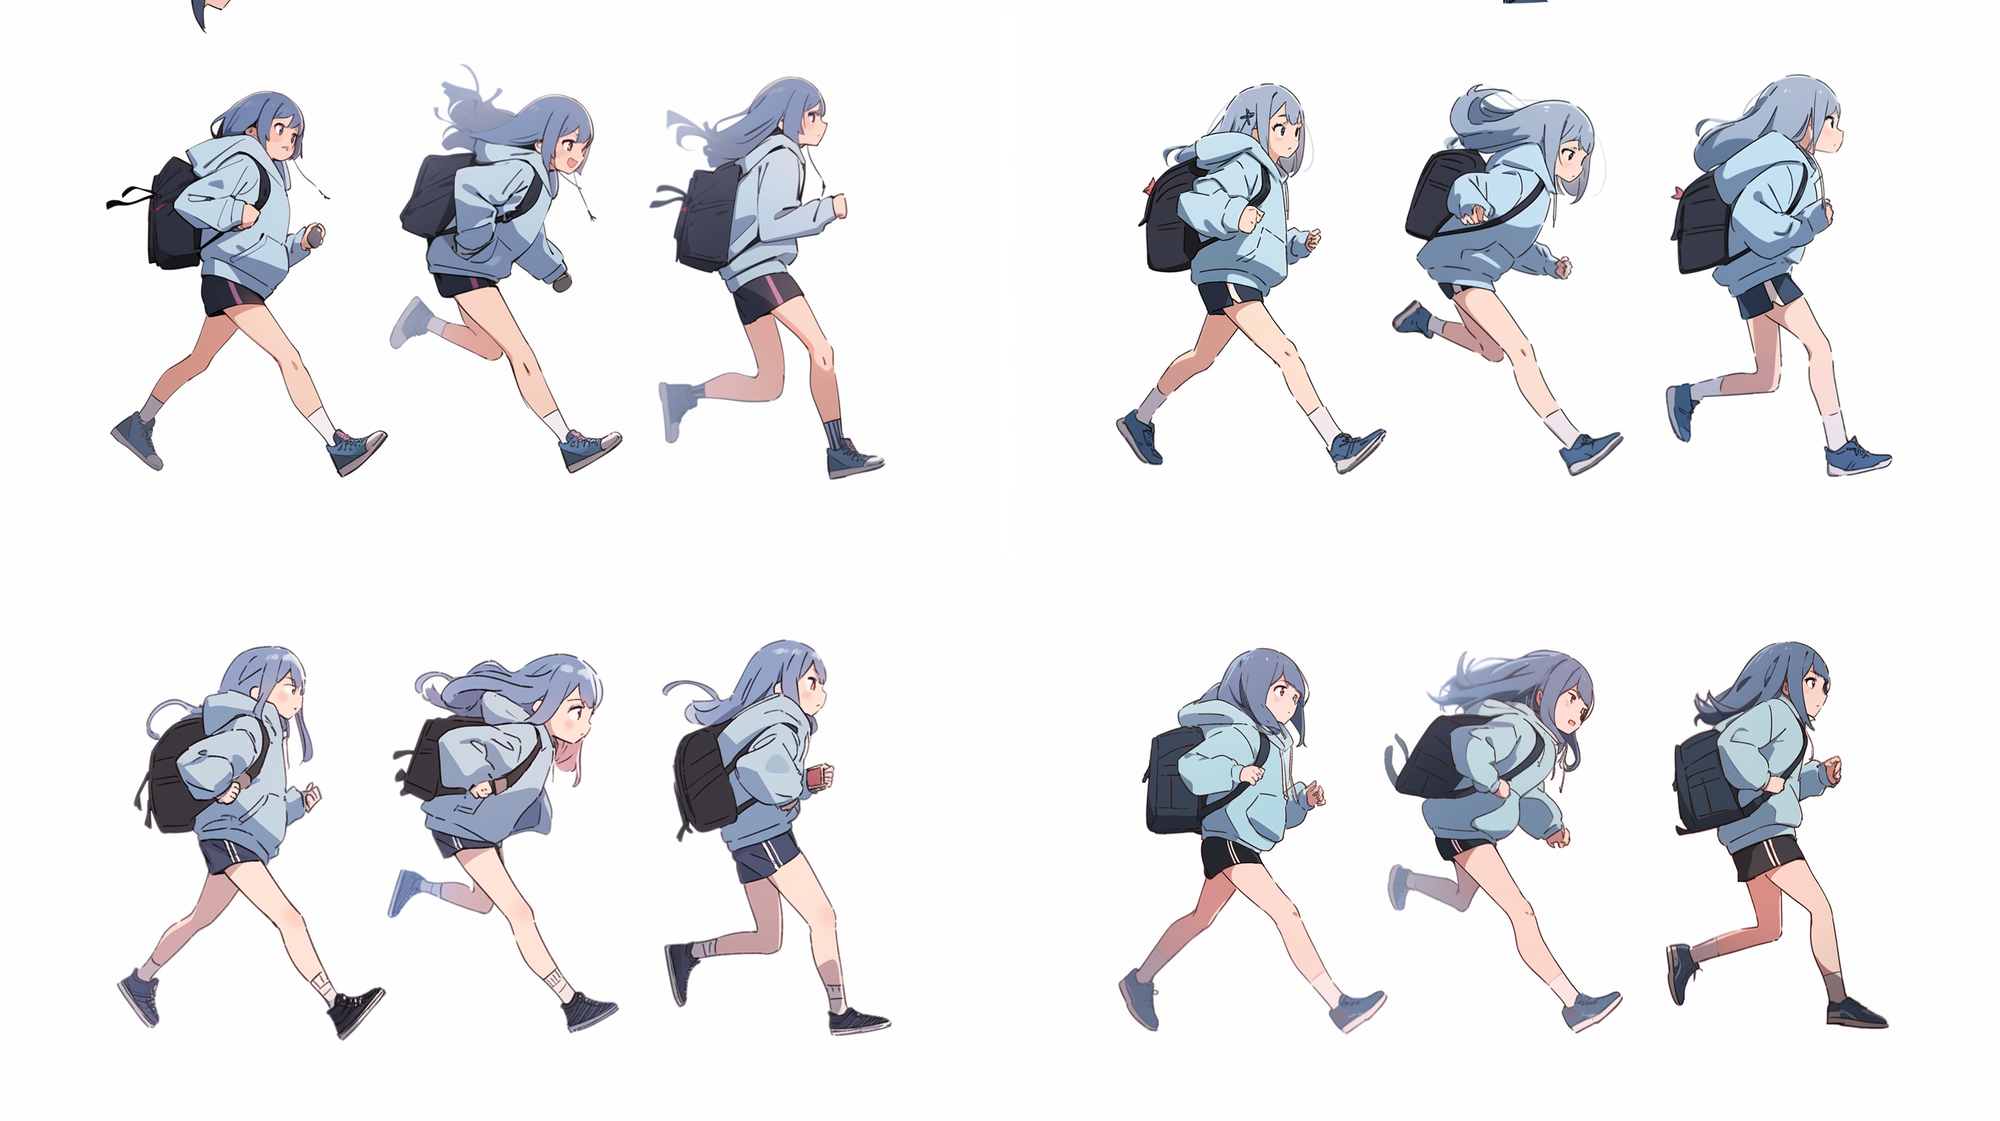
Generating Action Poses
Now that our basic character prompt looks good let's add some stuff to let MidJourney know we want a variety of poses.
In most cases, you'll want the flexibility of having the entire body of the character visible for poses. In contrast, you can often get away with just the face or upper body for expressions.
Considering all this, let's add the following to the beginning of the base character prompt. If you've already done the core poses or expressions, you should strip its prompt additions from the base prompt before adding these.
full body turnaround, multiple action poses, her, blue hair, running, jumping, defending, attacking
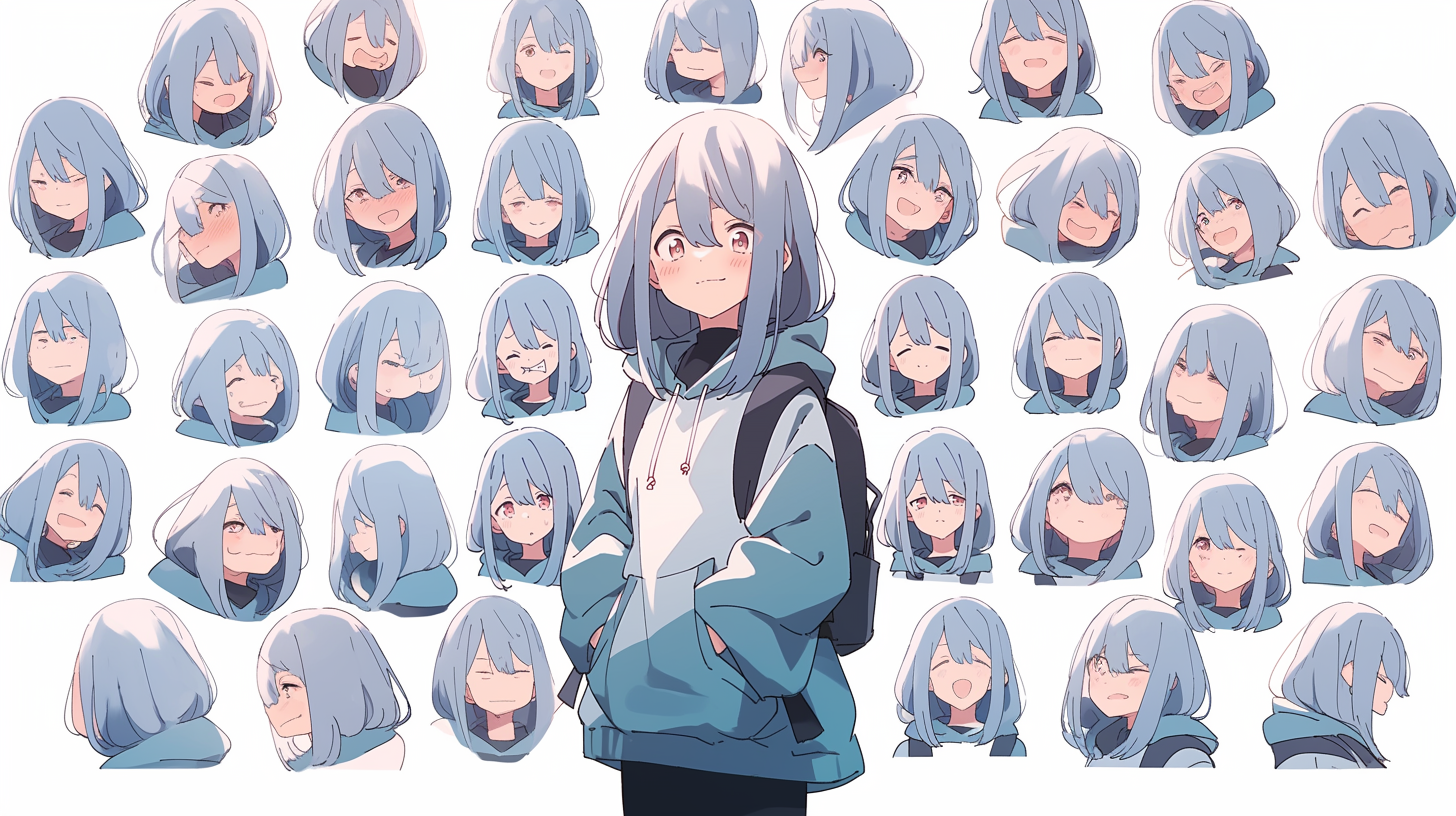
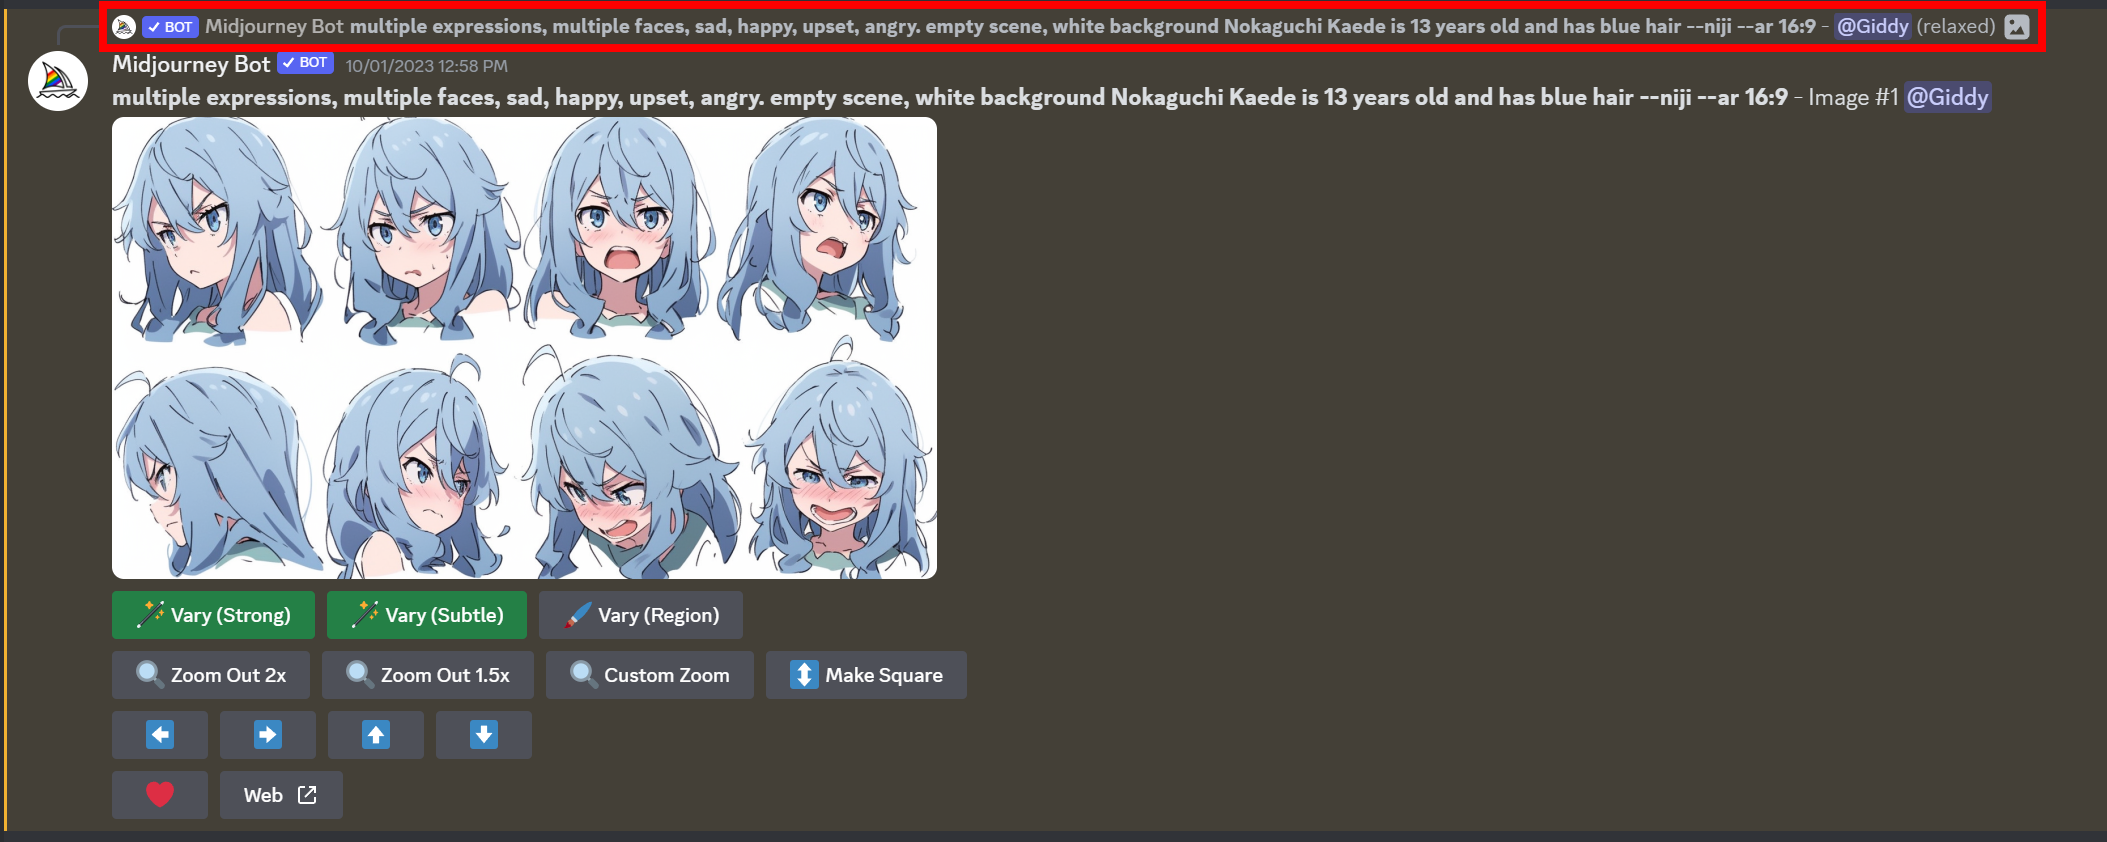
Generating Expressions & Emotions
Now that our basic character prompt looks good let's add some stuff to let MidJourney know we want a variety of poses.
Considering all this, let's add the following to the beginning of the base character prompt. If you've already done the core poses or action poses, you should strip its prompt additions from the base prompt before adding these.
multiple expressions, multiple faces, sad, happy, upset, angry, her, blue hair
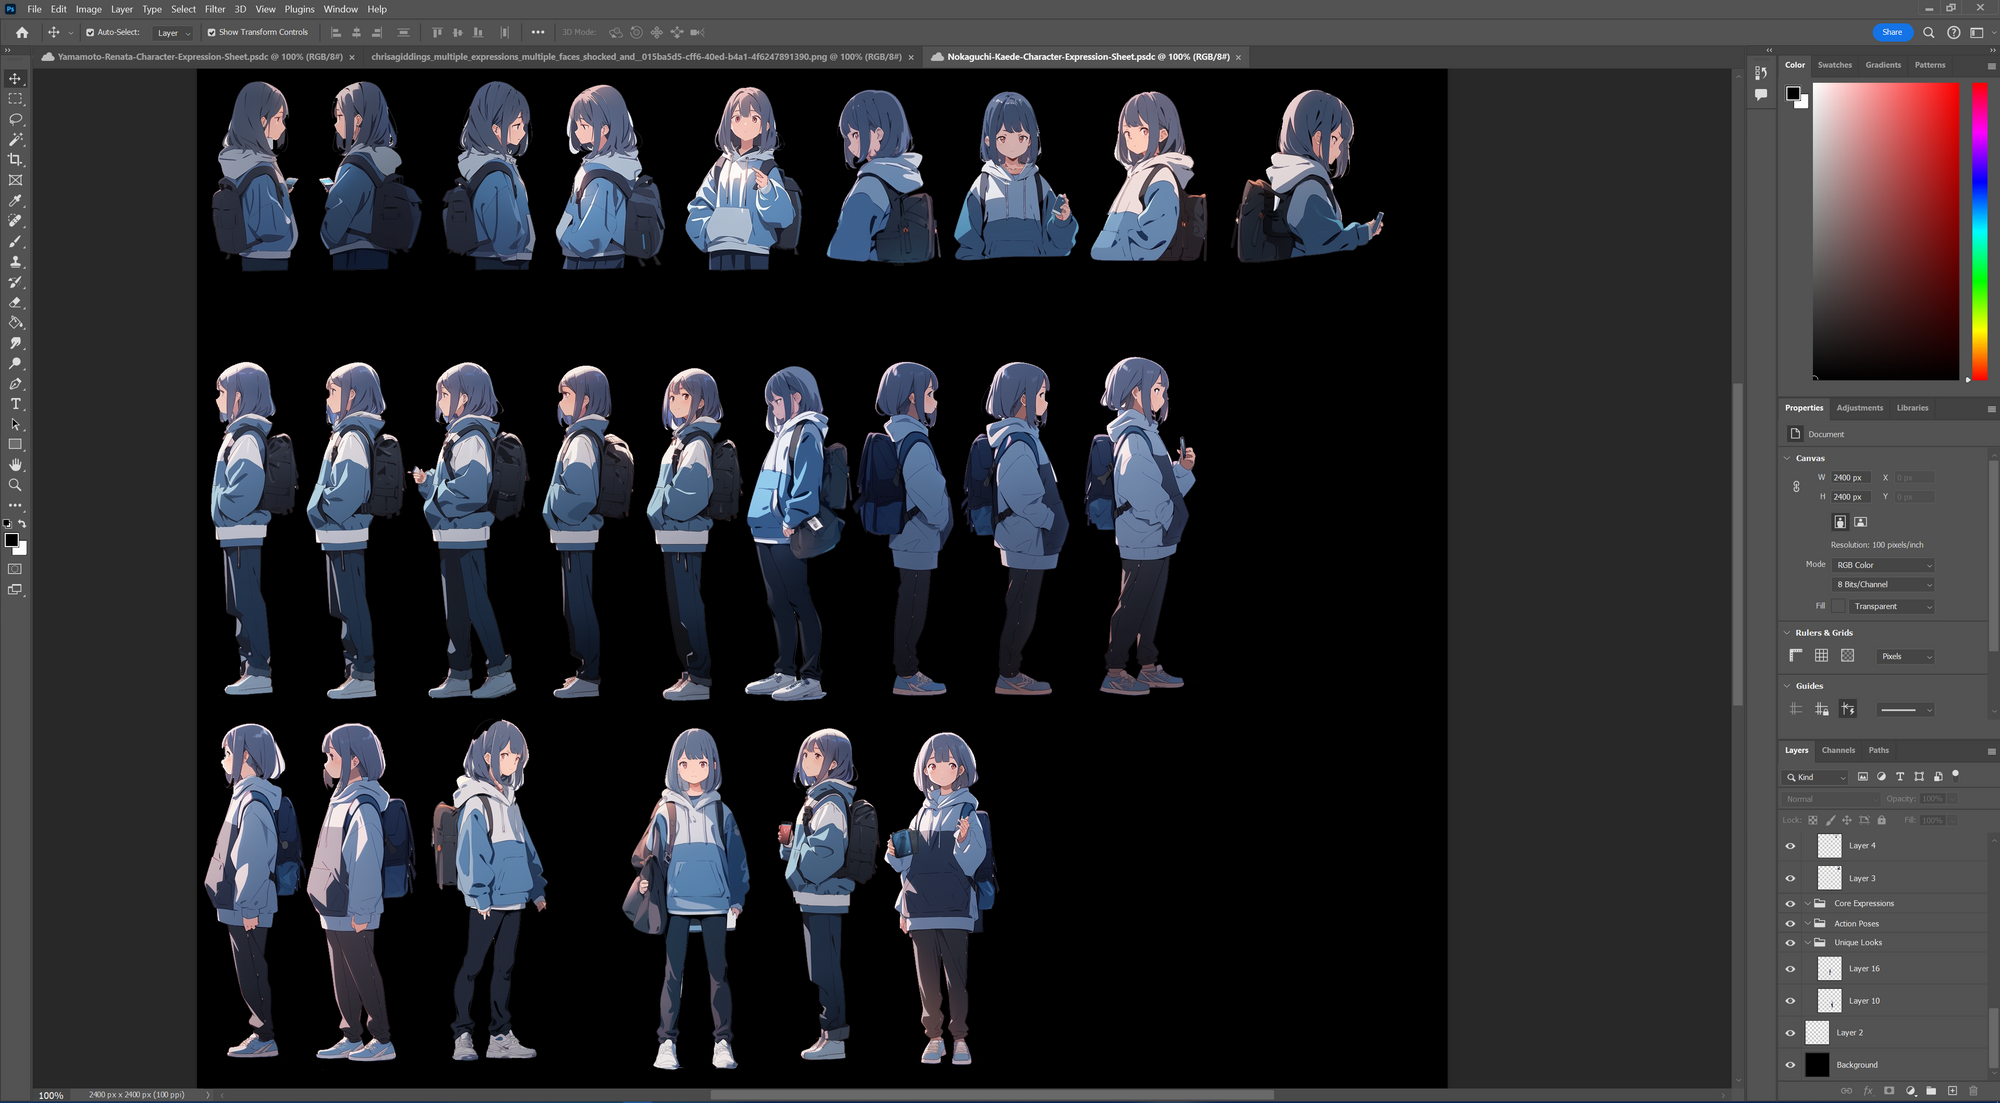
Building the Character Sheet
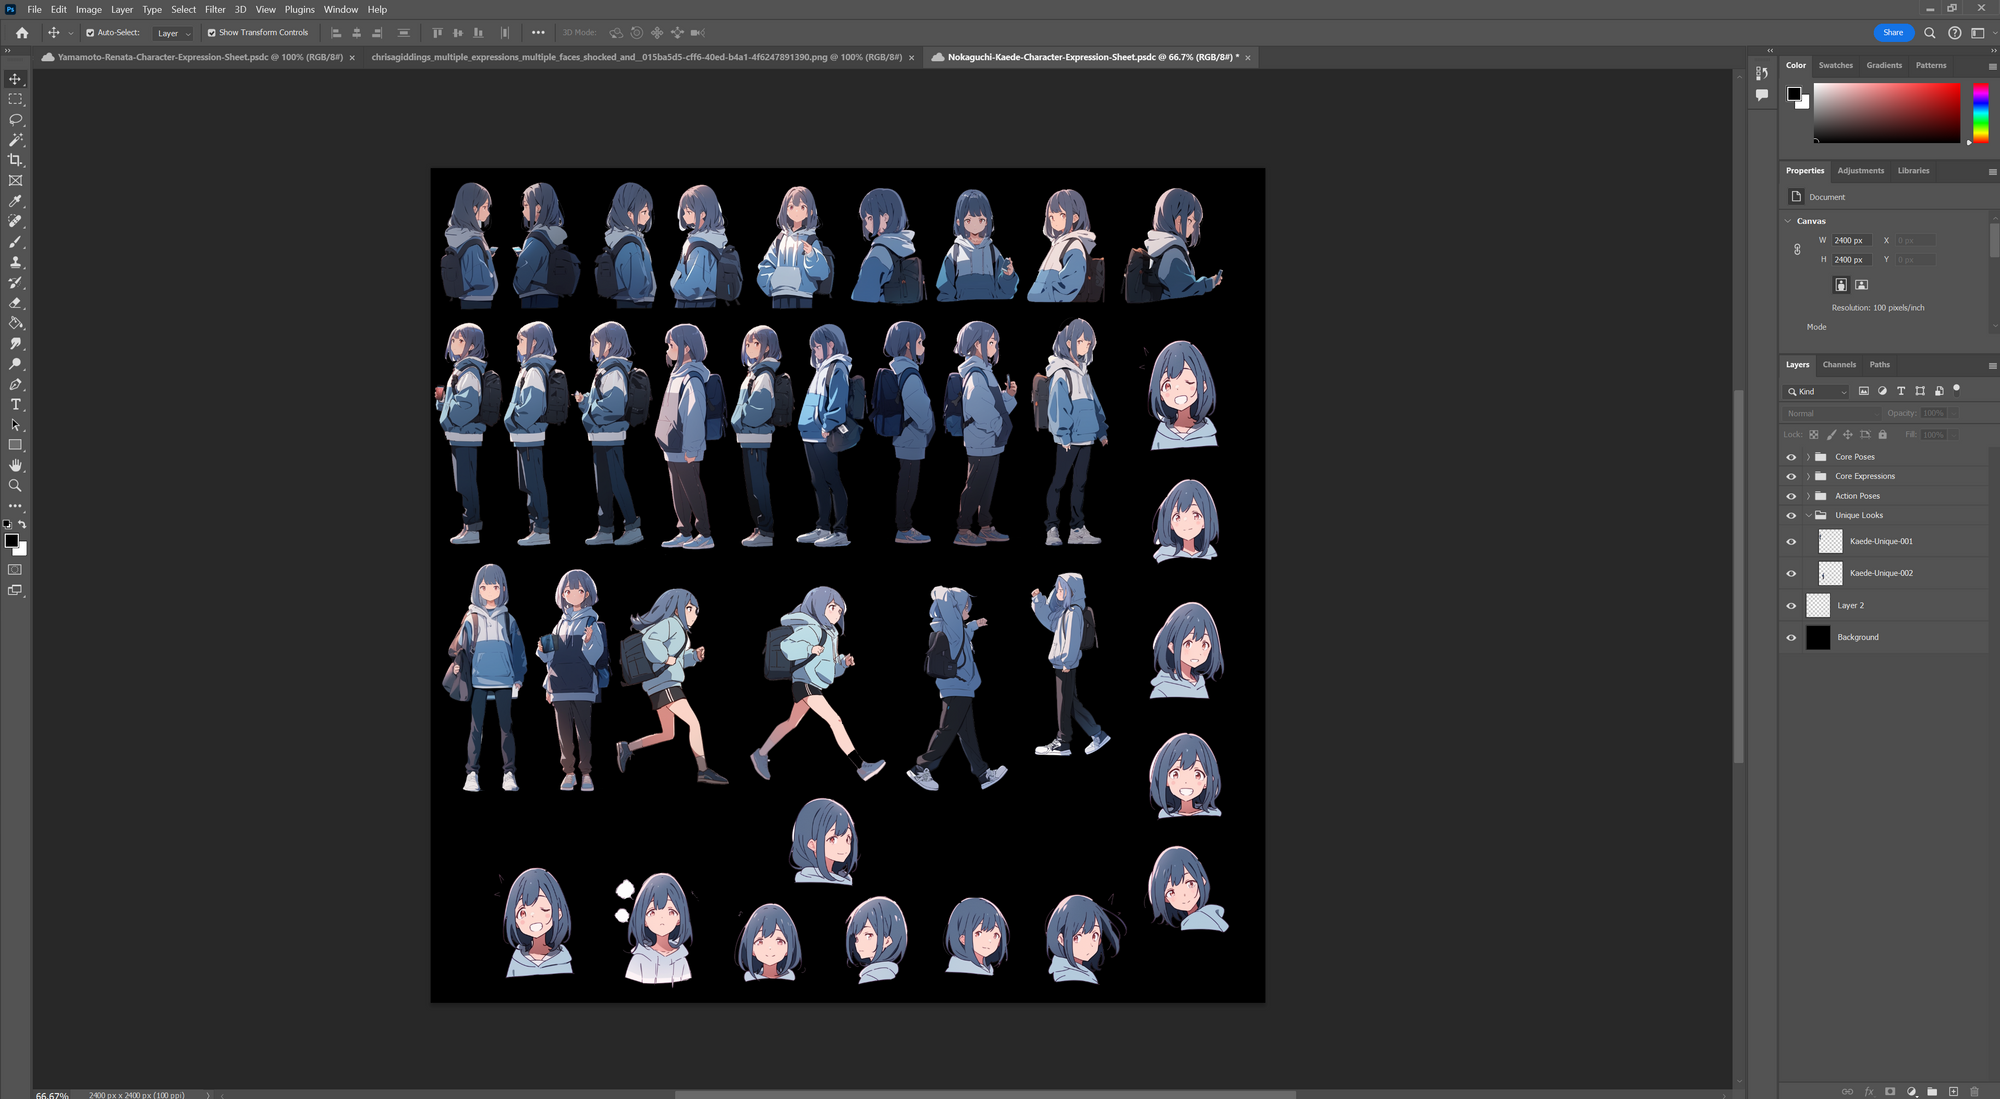
This is the less creative part, where we put the parts we like onto a character sheet in an image editor. I will be using Adobe Photoshop, but you could use another tool. This is the busy work of our process, where we use the lasso tool to draw a border around the poses and expressions we like, cut them, and paste them onto the character sheet.
Create an Empty File
The character sheet doesn't exist yet, so we must create a new blank file in our image editor. I have created a 2400px by 2400px file at 100dpi for my needs, as I hope this is sufficient room. Ultimately, depending on your character's various poses and expressions, you may need more or less room.
Hopefully, you have upscaled the results from the one original set you liked and regenerated until you got all the poses you need.
Copypasta
Open each saved set of poses or expressions in your image editor. Select the area around a given look you want to keep in your set for the character and cut it out of the downloaded pose file. Then, paste it into the character sheet file we just created.
We must repeat this for every look we want across however many files we need to get all those looks. This includes core poses, action poses, core expressions, and any unique poses or expressions we may have.
Exporting Each Look
To give us the best results when injecting our character into other prompts with MidJourney, we want only to send MidJourney what's essential for what we require.
MidJourney can't make complex decisions, at least not yet. As a result, everything we give to MidJourney in each prompt will be attempted to fit into the resulting image generation.
This occurs in a descending level of importance, going from the beginning of the prompt to the end. The stuff you tell it later may be ignored, depending on how long or complex your prompt is.
By exporting each look individually, we give ourselves the ability to send MidJourney only the signals we want to send. Just the poses and expressions applicable to the specific output we want.
For this reason, it's best to organize each look on a unique layer within the graphics file your editor produces, if at all possible. The ability to export just one layer or all layers as individual files simultaneously gives us just what we want for maximum flexibility.
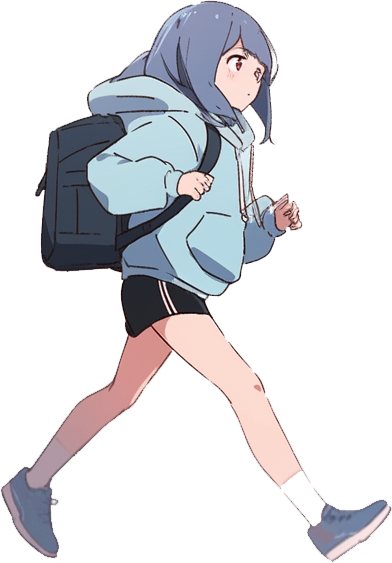
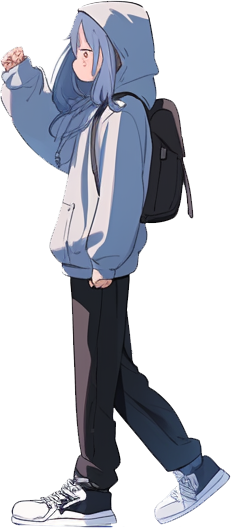
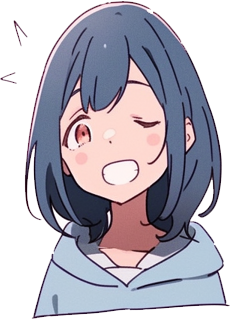

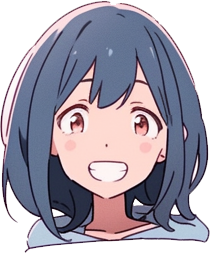
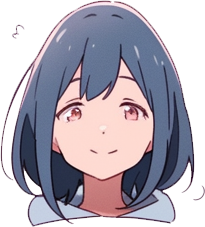
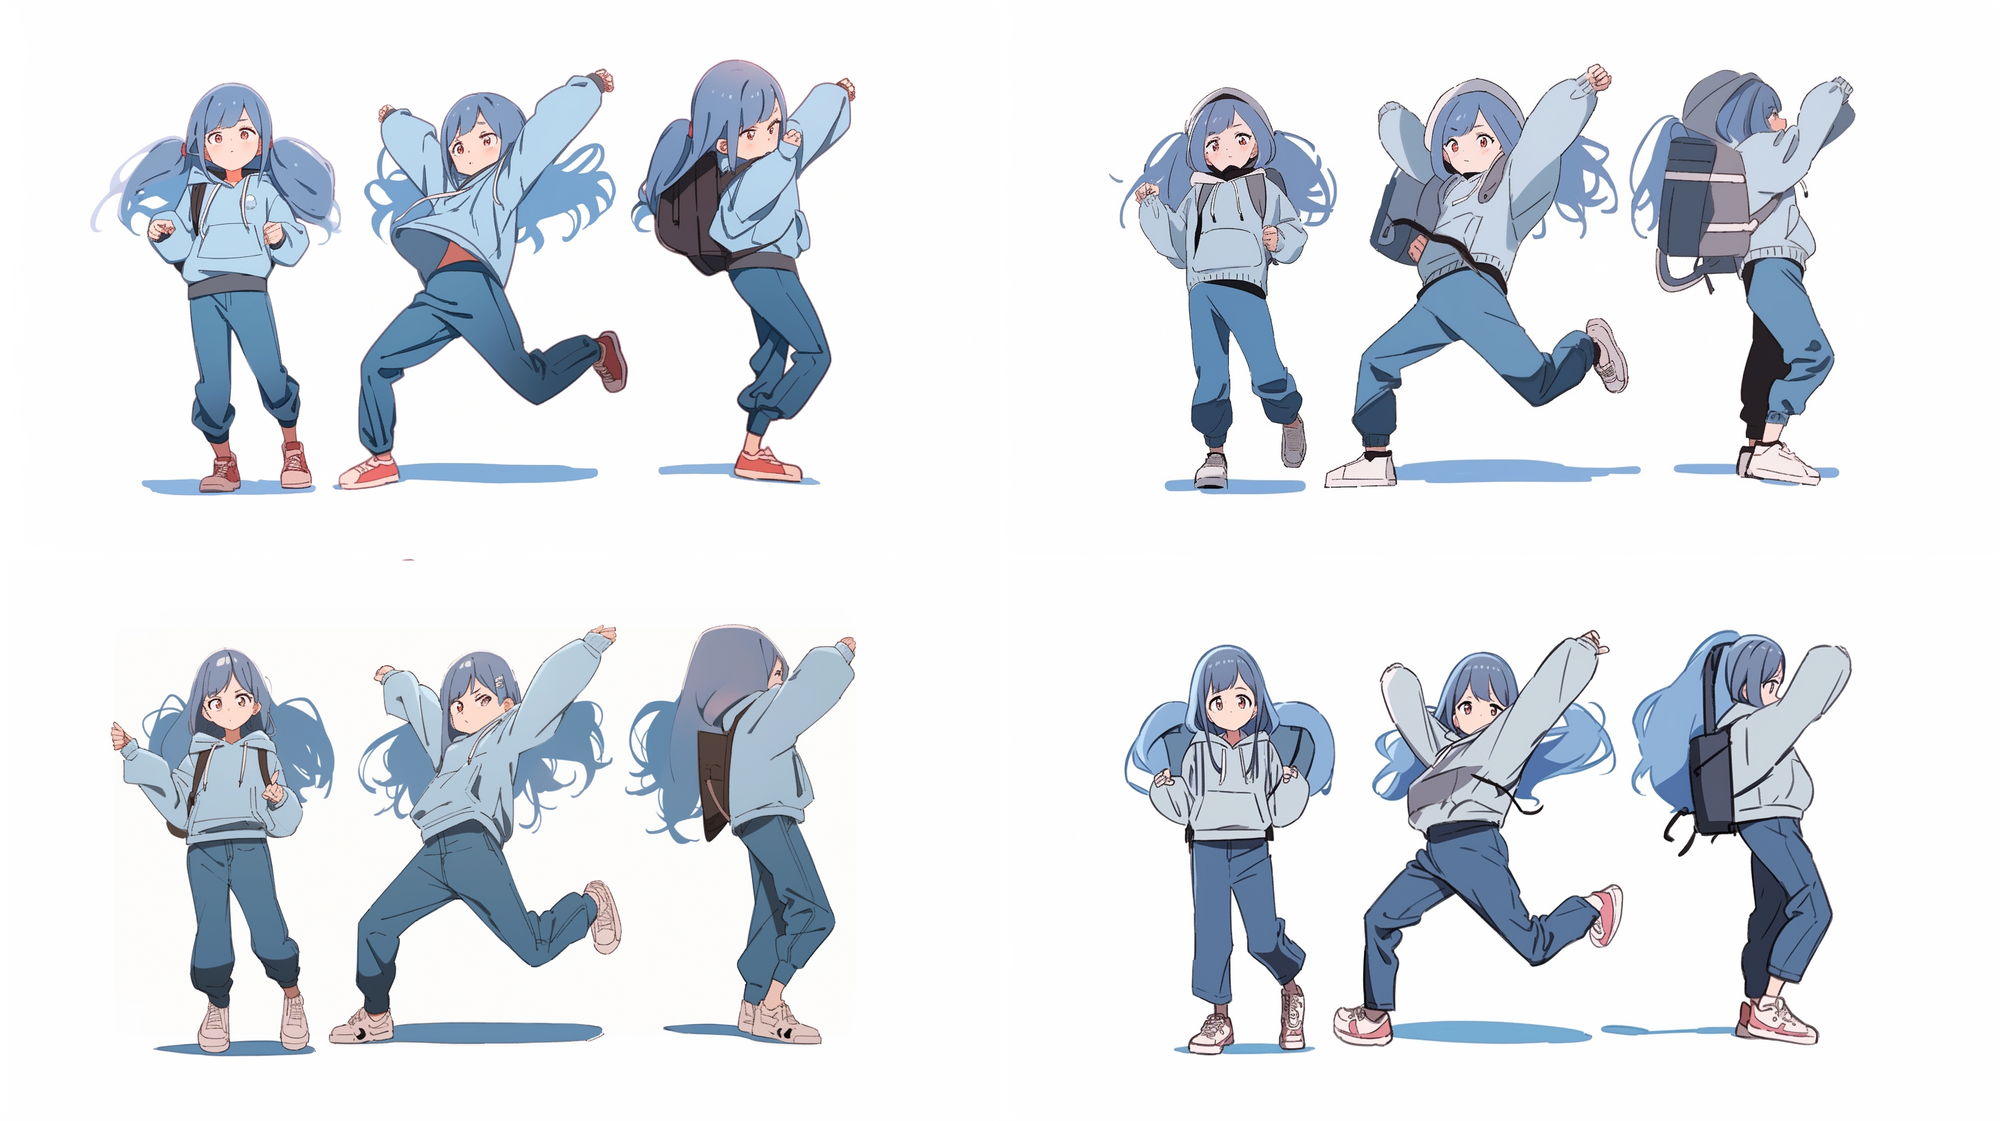
A gallery of individual poses and expressions for Kaede, generated by MidJourney, edited in Photoshop, and exported
Injecting Our Character
The injection process requires we have the remix feature turned on in MidJourney. With remix turned on, we are prompted when we attempt to vary our upscaled results. Here, we can put in a series of image URLs or use a saved preset containing image URLs. This method allows MidJourney to alter an already generated result considering the additional detail we feed to the system.
Blending in MidJourney is where we put in one or more image URLs when starting a fresh prompt. This is fine, but it won't get us the same level of consistency as the injection method. If your goal, like mine, is consistency in character appearance, I definitely suggest focusing on the injection method.
An upscaled result from MidJourney and a grid of injected results with Kaede's look exported as individual files.
Additional Notes
Use Presets
Try saving your character's basic look as a preset using /prefer option set a powerful tool MidJourney offers. With this, you can quickly inject your character and their personality without having to copy and paste a bunch of URLs each time manually.
In this case, my preset might be --kaede. If I use a character a lot, I may save a variation with a similar name, such as --kaede_angry or --kaede_attack using a specific set of images.
A Note of Caution
As of MidJourney v5.2, when using injection, subsequent re-rolls (🔄) of a grid of results you're unhappy with (doesn't fit your character, or just not a fit) will be treated as a fresh prompt, not an injection attempt. This defeats the purpose of using injection in the first place.
Be cognizant of how you are attempting to change your results when you don't see something you like. Returning to the original result you liked and using the vary option again (strong, subtle, region) will be better.
Thankfully, MidJourney makes it easy to return to your original prompt. You will see the original prompt linked at the top of the upscaled item's Discord message on any upscaled image. Click on it to scroll back to the original message.
Putting it all Together
Finalizing a character sheet is important in rounding out your character's details for a deep, meaningful participant in any story. While this article covers only the poses and expressions your character may use, a full character sheet should include their name, attributes (age, gender, biography, fears, weaknesses, vices), and more.
Whether you're developing a character for a comic, novel, video game, TV series, or just for fun, the more you know about them, the better you'll be able to help them express themselves naturally according to who they are.
In Summation
The ability to influence the output in MidJourney is more than just the text of a prompt, but also the feeding in of example images to get more consistent output.
To do this, we need to start with the basis of a character, refine and tweak them until we know them well, and then generate supporting imagery without distractions that we can give MidJourney to influence its output.
Using the methods shared in this article, we should now be able to take a character, generate unique poses and expressive depictions, and leverage those to get MidJourney to alter other images to get what we want with much greater consistency.
What characters might you create? What stories might you tell? Was this content helpful or interesting to you?
Be sure to subscribe so you can be among the first to know when I post new content!


Member discussion